StarLapse System

Astronomical & Terrestrial Camera Motion System


StarLapse System

Designed for the astronomer as well as the serious videographer, the StarLapse system will accurately track your camera or telescope for celestial observation.

Using the same worm-gear drive system as the time-tested Losmandy GM-8 German equatorial mount (but without the declination portion) the StarLapse will maintain accurate tracking at both sidereal and solar rates for razor-sharp astro-photographs.

In addition to sky viewing, the StarLapse can add dynamics to time-lapse videography by permitting camera motion during the duration of the shot. The camera can be set up to pan or tilt at nine different speeds from 7.5° to 240° per hour to provide smooth camera motion at any frame rate.

StarLapse System

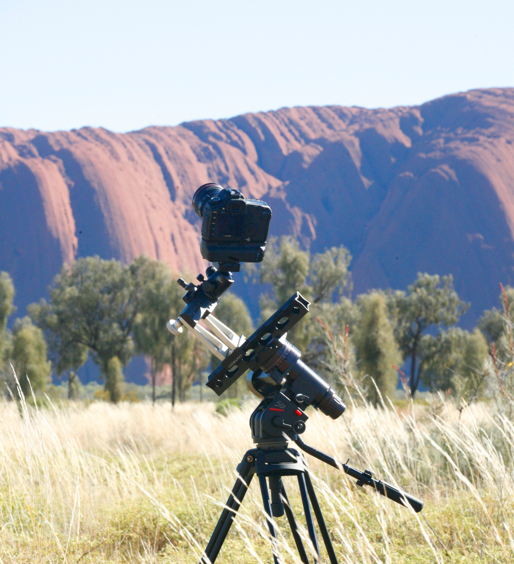
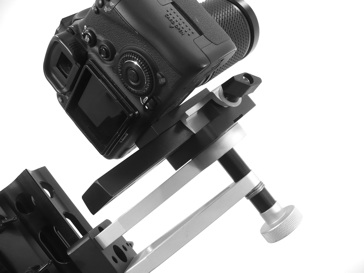
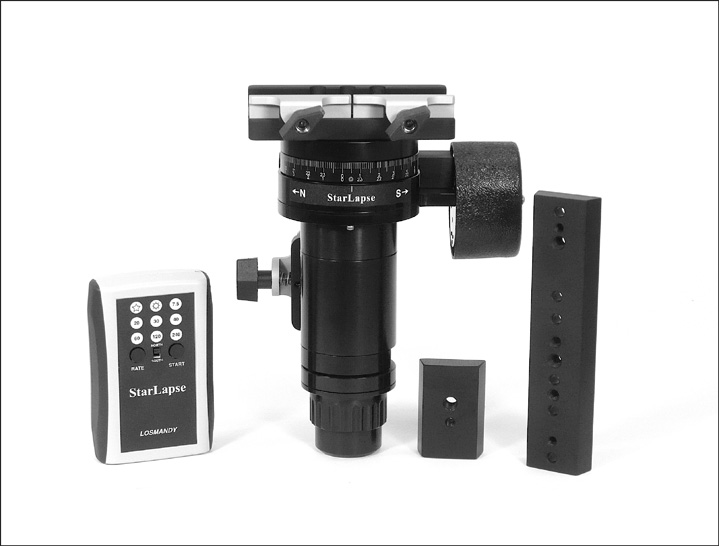
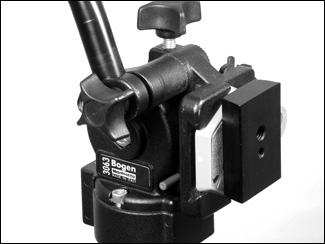
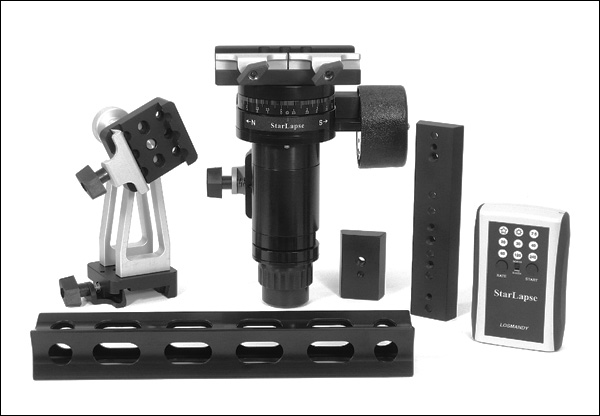
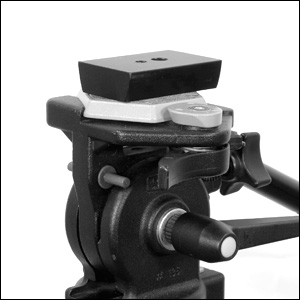
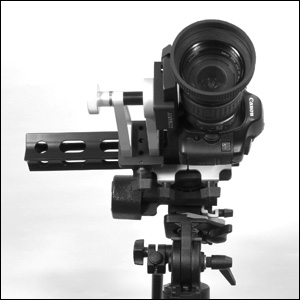
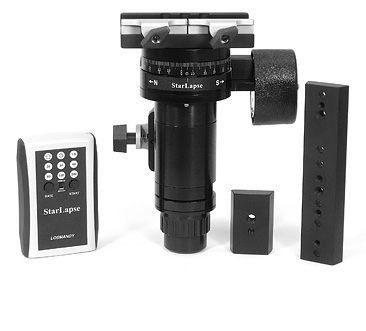
Designed for portability, the StarLapse system packs up small and light � less than 8 3/4 pounds (4 kg). Mount it on any tripod and 
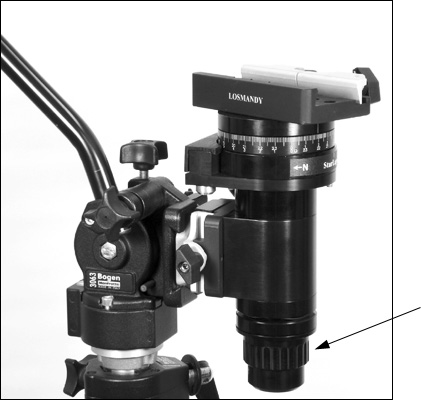
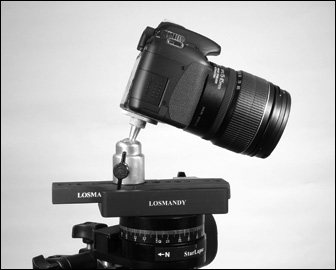
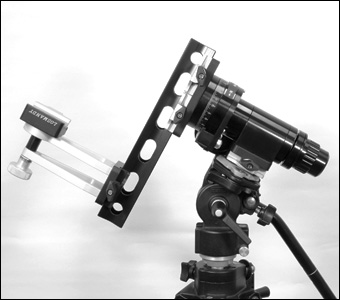
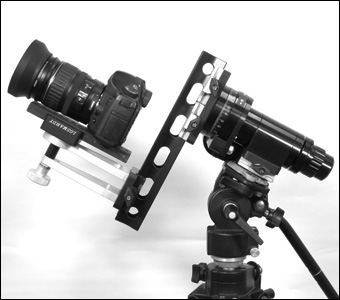
use its tilt and pan to adjust for polar alignment. The Losmandy 
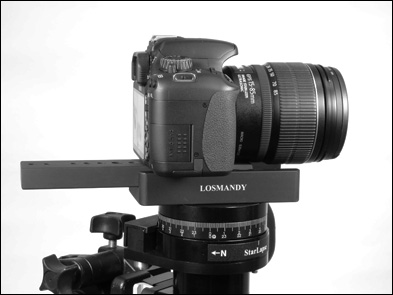
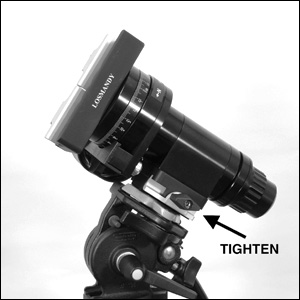
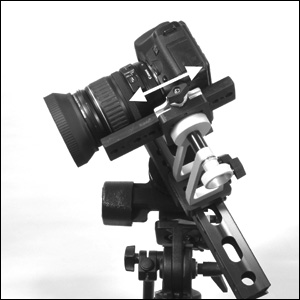
dovetail mount system makes balancing your camera quick and simple, with no counterweights or tools required � a big plus in cold 
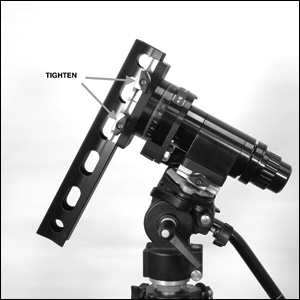
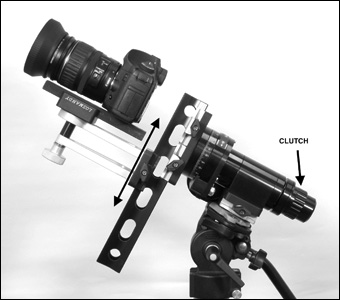
weather. Just loosen the large knurled clutch knob to aim the scope/camera at any point in the sky.

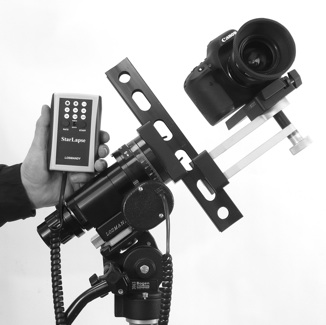
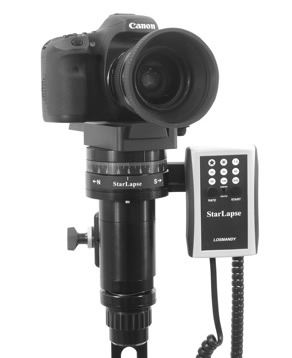
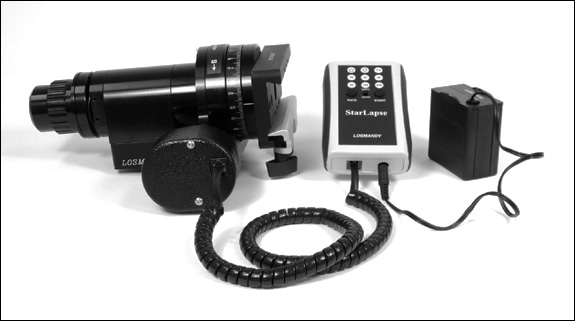
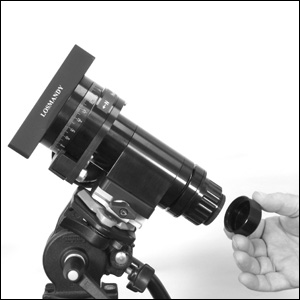
The StarLapse is a true worm gear drive mechanism using brass and anodized aluminum. It can rotate 360° continuously in either direction for astronomical use in both the northern and southern 
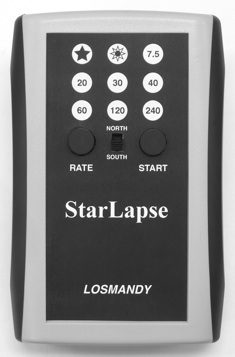
hemisphere. Accurate timing is provided by a crystal-based microprocessor in an easy-to-use controller. Select any one of the nine speeds, the north/south direction, and press start to activate the stepper motor.

Power consumption is very low, especially when using a celestial mode. More than 60 hours of operation can be obtained from a pack of 
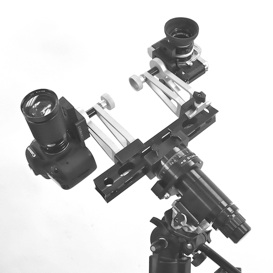
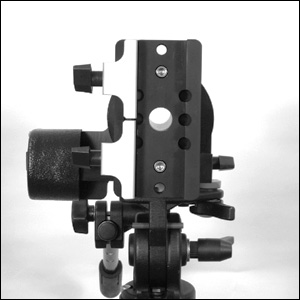
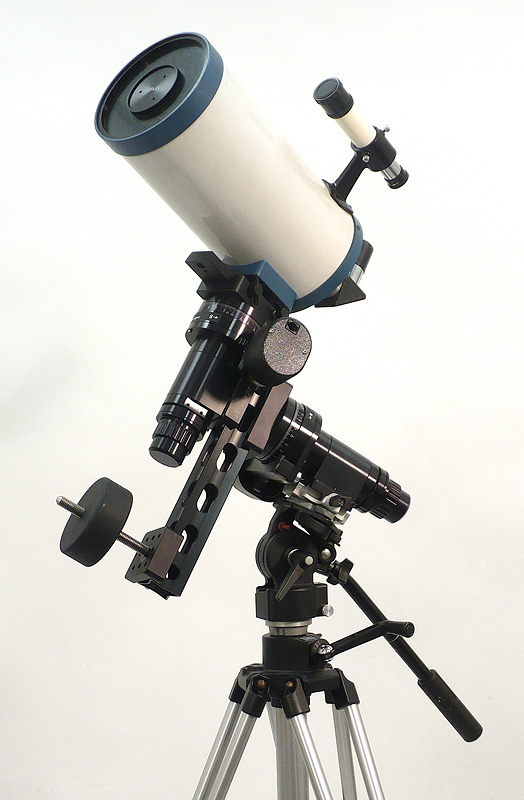
eight AA alkaline batteries. Based on the famous Losmandy GM-8 German Equatorial Mount used by serious astronomers world-wide, the StarLapse is constructed from machined aluminum and stainless steel, and can handle a payload of up to 30 pounds (13.5 Kg) allowing the use of larger or multiple cameras, or heavier telescopes when placed on a heavy-duty tripod or pedestal mount.

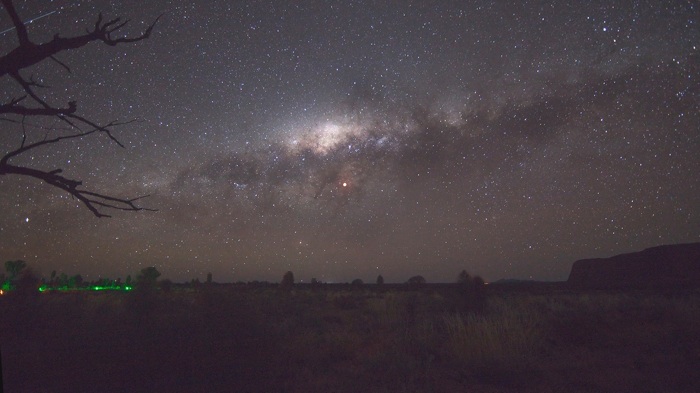
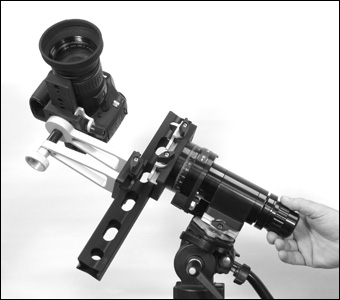
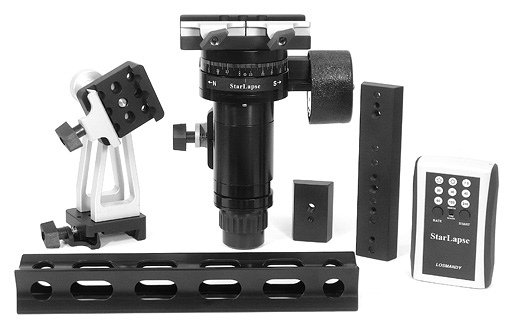
StarLapse from Losmandy is the perfect system for astronomers and videographers who don�t want to carry lots of heavy equipment when traveling to make astronomical images or time-lapse motion pictures. All components can easily fit in a backpack or small case with room to spare for your camera, a battery pack, and accessories.

StarLapse Controller

Speeds are sequentially illuminated as you press the RATE button making selection easy in the dark. The center �30� flashes each time the motor is pulsed to indicate proper operation. Use with any 12 volt DC supply or battery pack at 250mA or higher and center positive 2.1mm plug.


Uluru Eclipse

2011 Lunar Eclipse, Uluru National Park, Australia. StarLapse System, Canon 5D MkII, 14mm 2.8         Photo by Peter Ward

 
  StarLapse Movie - UNT  

Example Video   (14 MB .mp4)

Video taken with the StarLapse System of the National Radio Astronomy Observatory dish, located near the McDonald Observatory near Fort Davis, Tx. There are two passes on the video. The first is a mild CU, and the second pass is the full dome image.

Video courtesy of:

Ron DiIulio
Planetarium and Astronomy Program Director
Physics Department
University of North Texas


Time Lapse Operation

When used with a camera and a shutter triggered by an intervalometer the StarLapse can add smooth panning to time-lapse movies. For example, you are shooting one frame every minute and the StarLapse is set for SOLAR (15°/HR). If playback is 30 frames per second the effective panning speed would be 7.5° per second. The camera can be mounted to tilt instead of pan enabling you to make shots such as moving up a tree or skyscraper while taking the time-lapse exposures. StarLapse will move at 7.5, 15, 20, 30, 40, 60, 120 and 240 degrees per hour. All speeds operate in continuous 360° rotation with never any need to reset to a starting position.


  StarLapse TL Mode
Here are some example videos of the StarLapse in operation:
  StarLapse for basic time-lapse, with Canon 7D DSLR.
(System as shown without camera: $575.00)
     
  Videos   Videos Other Videos
iStopMotion Demo Great Lakes Stargaze 2012 StarLapse Movie 1 (13.5 MB .mp4)
Infrared Landscapes   StarLapse Movie 2 (3.8 MB .mov)
Fallbrook Starry Skies   StarLapse Movie 3 (1.3 MB .mov)


StarLapse System   StarLapse System

The sliding dovetails permit quick and easy balancing without the need for any counter-weights, even when using a long lens.


Optional multiple camera set-up on the StarLapse system.


StarLapse � Simple Operating Instructions
Click here to download PDF  

In its basic configuration the StarLapse System can be used to add dynamics to your time-lapse videos.

StarLapse System
 

SIMPLE PAN MODE

The camera will pivot horizontally at the degree-per-hour rate set by the controller. Your tripod head mounting plate should be set vertically. Use a 90° adapter or adjust the legs if necessary.

 
StarLapse System  

Using the 1/4-20 or 3/8-16 threaded hole, mount the small dovetail plate to the tripod head with the narrow side inward.


StarLapse System

Attach the StarLapse motor assembly to the dovetail making sure to securely tighten the thumb knob.


Loosen knurled knob to release the clutch. Point the StarLapse in the desired direction and re-tighten.


StarLapse System  

Mount your camera to the longer dovetail plate using a 1/4-20 socket cap screw. Slide the dovetail with the attached camera onto the dovetail clamp of the motor assembly with the center of gravity as close as possible over the center of rotation. In this photo the dovetail is offset to allow clearance of the lens barrel to permit rotation. Also note that the tripod handle has been removed to avoid interference with the StarLapse rotation


USING THE ELECTRONICS

Connect a center-positive 12 volt DC power source rated at 500 milliamps or higher to the input connector. Our battery pack (STLA-BP) loaded with eight AA alkaline batteries is recommended, and can operate the system for more than sixty hours when used at the moderate or slower speeds. Where AC is available you can use our universal DC power supply (part# ACDC). Circuitry of the StarLapse is regulated to protect the internal electronics, however, the motor is driven directly from the DC input voltage. The motor is optimized for 12 volts but can safely operate at a slightly higher voltage. DO NOT EXCEED 18 VOLTS for the power source! The system will run at voltages as low as 7 volts but the motor may no longer have enough torque to reliably pulse.


StarLapse System
 

The motor connects with a 6-conductor modular connector. Be sure to dress the cable such that it will not bind or impede the motion of the StarLapse system.

When power is applied to the control, the first icon will glow to indicate that the system is set for the default SIDEREAL mode. Press the RATE button to cycle through the icons and select the desired speed. The SUN represents the SOLAR rate of 15°/hour, and all numeric icons are degrees/hour.

The NORTH/SOUTH switch determines the direction of rotation as indicated by the arrows on the StarLapse motor assembly. For celestial use set the slide switch for NORTH or SOUTH depending on your location with respect to the equator. The StarLapse must be polar-aligned when tracking stars.

Press START when you want the motion to begin. The center icon (30) will pulse in sync with the motor speed to indicate proper operation.

All buttons become inoperative once the system is started. To stop or change operation you must temporarily disconnect the power from the controller and start over.


SLOW-MODE

If you press AND HOLD the START button for three seconds all speeds become 1/10th the indicated value, IE: �20� is 2 degrees per hour; �60� is 6 degrees per hour, etc. The three vertical center LEDs (SOLAR, 30, 120) will flash to indicate operation in the SLOW-MODE. You may want to use this when time intervals between frames may run into minutes.


TILTING THE CAMERA

StarLapse System  

If your shot requires the camera to point away from horizontal, you will need to use a ball-joint or tilt plate adapter as shown. Use the strongest available and be sure to tighten securely before starting the shot.


AND A FINAL NOTE ON PANNING RATES...

An easy way to figure out your degree-per-hour panning speed is to start with your frame rate and determine how far you want the camera to pan during the duration of the entire exposure.

For example, you want to shoot one frame per second, to be played back at a speed of 30 frames per second. That means every hour of shooting will provide 3600 frames (60 secs x 60 mins), with a playback duration of 120 seconds or two minutes (3600/30).

You plan on shooting for two hours (total playback of four minutes) and want to pan 120° during that time. You would select the 60° per hour rate.

* * * * * * * * * * * * * * * * * * * * * * * * * * * * * *

Accessories are also available to permit time-lapse TILT motion, celestial tracking, compound movements, and more...

Click here to download PDF  
 

StarLapse setup instructions for astronomical use. (18MB .mov)   StarLapse setup video


StarLapse � Astronomical Setup
Click here to download PDF  

The StarLapse System can be balanced for use with most cameras without the need for counterweights.

StarLapse System

You will need the STLA-SYS which contains the above components.


  StarLapse System

Using the 1/4-20 or 3/8-16 threaded hole, mount the small dovetail plate to the tripod head with the narrow side inward.

  StarLapse System

Attach the StarLapse motor assembly onto the dovetail and tighten the thumbscrew securely.


  StarLapse System

Unscrew the shaft cover knob to facilitate polar alignment. The use of a polar scope is highly recommended to ensure accurate tracking.

  StarLapse System

Polar align the StarLapse mount before attaching the camera assembly. This will prevent blocking the center through-hole.


  StarLapse System

Attach the main beam as shown and securely tighten both thumbscrews.

  StarLapse System

Attach the camera mount assembly and tighten securely.


StarLapse System

Attach the camera (already mounted to the larger dovetail). Be sure to point the camera as shown and tighten the camera mount knob.

  StarLapse System

Loosen the large knurled clutch knob. Place a hand under the camera assembly and loosen the thumbscrew. Slide the assembly up or down as necessary to place its center of gravity in line with the axis of rotation.


  StarLapse System
  StarLapse System
 

When you have correctly done this you should be able to rotate the main beam to any angle and let go without any further movement. Be sure to always re-tighten the camera mount thumbscrew to prevent it from sliding off during the rotation.


  StarLapse System

Rotate the camera 90° and note any tendency for the assembly to rotate because of an imbalance. Slide the camera dovetail as necessary to maintain the correct center of gravity. With the clutch loose, you should now be able to point the camera anywhere with no out-of-balance rotation.

  StarLapse System

Make sure all thumbscrews are secure. Point the camera at the desired celestial object and tighten the camera mount knob and the black clutch knob before starting photography.


USING THE ELECTRONICS

Connect a center-positive 12 volt DC power source rated at 500 milliamps or higher to the input connector. Our battery pack (STLA-BP) loaded with eight AA alkaline batteries is recommended, and can operate the system for more than sixty hours when used at the moderate or slower speeds. Where AC is available you can use our universal DC power supply (part# ACDC). Circuitry of the StarLapse is regulated to protect the internal electronics, however, the motor is driven directly from the DC input voltage. The motor is optimized for 12 volts but can safely operate at a slightly higher voltage. DO NOT EXCEED 18 VOLTS for the power source! The system will run at voltages as low as 7 volts but the motor may no longer have enough torque to reliably pulse.

The motor connects with a 6-conductor modular connector. Be sure to dress the cable such that it will not bind or impede the motion of the StarLapse system.

When power is applied to the control, the first icon will glow to indicate that the system is set for the default SIDEREAL mode. Press the RATE button to cycle through the icons and select the desired speed. The SUN represents the SOLAR rate of 15°/hour, and all numeric icons are degrees/hour.

The NORTH/SOUTH switch determines the direction of rotation as indicated by the arrows on the StarLapse motor assembly. For celestial use set the slide switch for NORTH or SOUTH depending on your location with respect to the equator. The StarLapse must be polar-aligned when tracking stars.

Press START when you want the motion to begin. The center icon (30) will pulse in sync with the motor speed to indicate proper operation.

All buttons become inoperative once the system is started. To stop or change operation you must temporarily disconnect the power from the controller and start over.


StarLapse System
 

Typical connections with the optional 12 volt battery pack (STLA-BP) which uses 8 x AA cells. Make sure to dress the all cables such that they will not interfere with the rotation of the StarLapse.

 
Click here to download PDF  
 

StarLapse System with Declination Axis Module

By adding the declination axis module (SL�DEC) the StarLapse becomes a complete German Equatorial Mount functionally equivalent to the Losmandy GM 8 including autoguiding capability.

Module includes GM 8 electronics with hand controller: $649.00

(Does not include the 1969 Celestron Pacific 6� �8 Schmidt-Cassegrain telescope, optional VWS counterweight or tripod.)
  StarLapse DEC
     

StarLapse Basic System   StarLapse Full System
Basic system with tripod and camera mounting plates.
For general time-lapse panning function. Includes controller, interconnecting cable and 12 volt cigarette lighter power cord.

STLA-BAS $575.00
  Full system includes the Camera Mount Assembly and 12" Extruded Beam to enable balance without the need for counterweights. Recommended for astronomical use and time-lapse tilt movement. Includes controller, interconnecting cable and 12 volt cigarette lighter power cord.

STLA-SYS $695.00


Dimensions:
  • Main assembly 4Â� diam. x 8Â�
  • Beam 1.625Â� x 12Â�;
  • Camera Mount 5Â� x 8Â� x 3Â�
  • Weight: 8.75 lbs. (4 kg.)

Components:
  • Gear Drive Assembly and Controller: $575.00
  • Camera Mount Assembly: $115.00
  • 12Â� Beam: $35.00
  • System List Price: $695.00 (Includes above three pieces)
  • Optional Battery Pack (8xAA) $16.00
  • Optional Polar Scope (PS) $200.00
  • Optional Declination Module (SL-DEC) $695.00

DETAILED SPECIFICATIONS:
  • All machined aluminum and stainless steel, black anodized.
  • All stainless steel hardware.
  • One 2.100" diameter needle thrust bearing.
  • One 2.000" diameter needle thrust bearing.
  • Two 1.500" diameter needle bearings.
  • 2.812" diameter, 7075 aluminum worm gear, 180 tooth.
  • Dual supported, ball bearing housed ground brass worm.
  • Variable slip clutch. One knob design.
  • 1.250" diameter aluminum shaft.
  • 3.500" diameter laser engraved setting circle
  • Northern and Southern direction marker.
  • Porter slip ring design.
  • 160 oz/in stepper motor, 1.0 arc sec. per step.
  • Split Dovetail mount accepts "V" series dovetail plates.
  • Through the axis polar scope, works in Northern and Southern hemisphere.
    Polar scope optional.
  • Instrument weight capacity 30 lbs.
NOTE:   The StarLapse System is completely compatible with all GM 8 and Gemini 2 electronics and accessories for complete astronomical capability. Full German equatorial function is possible with the addition of the DEC axis assembly.

Download StarLapse Brochure (PDF)


Hollywood General Machining, Inc.
416 N. Varney St.
Burbank, California   91502
747-283-1075       FAX: 747-283-1078

For More Information Contact : Hollywood General Machining, Inc.